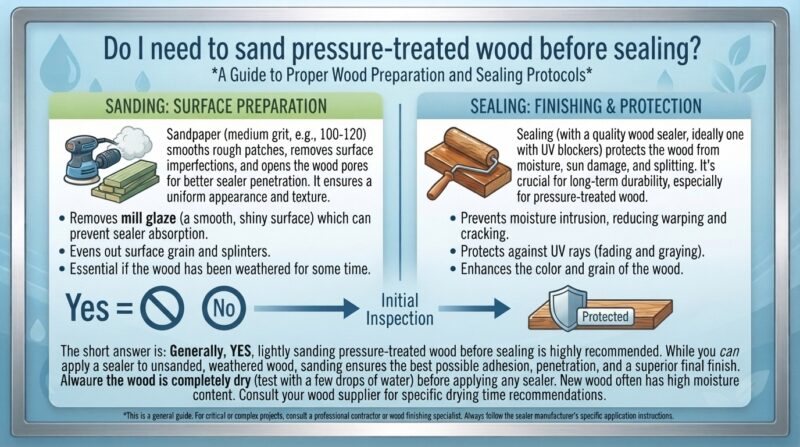
The short answer is it depends on the age, condition, and moisture content of the wood.
You do not always need to sand brand-new pressure-treated (PT) wood if it is still wet from manufacturing chemicals. However, you must sand pressure-treated wood before sealing if:
- The wood has developed mill glaze (a smooth, shiny layer created during mill planning that prevents sealers from penetrating).
- The wood is weathered, splintered, raised, or rough.
- You are re-sealing or re-staining an older deck or structure where previous coatings are flaking.
- The lumber passed the “water drop test” but feels fuzzy or uneven after cleaning.
Direct Answer: When Sanding Is Required vs. Optional
| Wood Condition | Is Sanding Needed? | Primary Reason | Recommended Grit |
| Brand New & Wet | ❌ No | Wood is saturated with treatment chemicals; sanding wet wood clogs sandpaper and creates toxic dust hazards. | N/A |
| New, Dry, with Mill Glaze | Yes | Mill glaze seals the pores, preventing stain or clear sealer absorption. | 80–100 Grit |
| Aged & Weathered (1–3 Years) | Yes | Removes grayed UV-damaged wood fibers and restores surface porosity. | 60–80 Grit, then 100 Grit |
| Previously Sealed / Peeling | Yes | Old sealer must be completely removed so new oil/water-based sealers bond. | 60 Grit to strip, 80–100 Grit to smooth |
| Smooth, Clean & Dried PT Wood | Optional | A light pass opens wood pores to improve product adhesion and absorption depth. | 80–120 Grit |
What Is Pressure-Treated Wood and How Does It Drying Work?
Pressure-treated lumber (typically Southern Yellow Pine or Douglas Fir) is forced under high pressure to absorb preservatives—such as Micronized Copper Azole (MCA) or Copper Quat (ACQ)—that protect against decay, rot, and termites.
When fresh PT wood arrives at lumberyards in regions like Texas, California, New York, or the Pacific Northwest, it contains high internal moisture levels (often exceeding 25–30% moisture content).
Why You Cannot Seal Wet Wood Immediately
If you attempt to apply sealer or stain to wet pressure-treated wood:
- The sealer cannot penetrate: The pores are physically saturated with water and chemical preservatives.
- Peeling & Blistering: Trapped moisture will attempt to evaporate upward when sun exposure heats the boards, causing the sealed coat to bubble and peel off within weeks.
- Mildew trapped underneath: Moisture sealed inside wood accelerates internal rot and dark mold growth.
Understanding “Mill Glaze” — The Hidden Barrier
During the manufacturing process, lumber is planed at high speeds. The extreme heat and friction press natural resins and sugars to the surface, creating a smooth, hardened seal known as mill glaze.
[ Unsealed Layer ] -> Mill Glaze (Crust) -> Wood Pores Blocked -> Sealer Runs Off
If you apply a clear water repellent or penetrating stain directly over mill glaze, the coating will sit on top of the wood rather than sinking into it.
How to Check for Mill Glaze
Inspect your dried boards under direct light. If the surface looks polished, slick, or shiny, mill glaze is present. Light sanding with 80-grit sandpaper breaks this shell and opens the cellular structure of the wood grain.
The Water Drop Test: How to Know When Your Wood Is Ready
Before deciding to sand or seal, perform the Water Drop Test:
- Splash a few droplets of clean water onto various sections of your pressure-treated boards.
- Observing the results:
- Water beads up into droplets: The wood is either too wet, treated with factory wax, or blocked by mill glaze. Wait 2–4 weeks and re-test, or sand the surface.
- Water absorbs within 1–2 minutes: The wood pores are open and dry enough to absorb sealant. You are ready to prepare and seal.
Safety Protocol: Sanding Pressure-Treated Wood
⚠️ Important Safety Warning: Pressure-treated lumber dust contains copper compounds and chemical fungicides. Breathing in PT wood dust or getting it in your eyes can cause respiratory irritation and inflammation.
Follow these required safety measures:
- Wear a NIOSH-approved respirator: Use an N95 or P100 mask (not a simple dust mask).
- Eye & Skin Protection: Wear safety goggles, long sleeves, and durable work gloves.
- Work Outdoors: Never sand pressure-treated wood in enclosed garages or indoors.
- Collect Dust Immediately: Lay down tarps under deck railings or collect dust using an orbital sander attached to a HEPA-filtered shop vacuum. Do not burn PT wood shavings or sawdust.
Step-by-Step Guide: Preparing & Sanding Pressure-Treated Wood
Follow this order of operations for maximum finish longevity:
Step 1: Clean the Wood
Before bringing out a sander, scrub the wood using an oxygenated bleach deck cleaner or a dedicated wood cleaner. This removes dirt, algae, and mold spores.
- Note: Avoid high-pressure washing (over 1,500 PSI) as it gouges soft pine fibers, creating “fuzzing” that forces extensive sanding later.
Step 2: Let It Dry Thoroughly
Allow the wood to dry for at least 24 to 48 hours of clear, warm weather after washing. Moisture content must drop below 15% (verified with a pin-type moisture meter).
Step 3: Choose the Right Sanding Equipment
- Decks & Large Flat Areas: Use a random orbital sander or a commercial floor deck sander.
- Fences & Vertical Posts: A 5-inch random orbital sander or detail sander works best.
- Hand Railings & Balusters: Medium-grit sanding sponges accommodate curved edges.
Step 4: Sanding Technique
- Use 60 to 80-grit sandpaper for heavy mill glaze, rough spots, or weathered gray wood.
- Finish with 100 to 120-grit sandpaper to smooth out scratches.
- Do not go finer than 120-grit on exterior wood. Sanding with 150+ grit polishes the wood too smooth, closing the pores again and reducing sealer adhesion.
Step 5: Vacuum and Tack-Cloth the Surface
Sweep away all dust particles, then vacuum the surface completely. Fine dust trapped in grain grooves will ruin the clarity of transparent and semi-transparent sealers.
Regional Climate Nuances for Texas, New York, California, Washington & San Francisco
Drying times and wood preparation strategies vary substantially depending on your local climate:
1. Texas (Austin, Dallas, Houston, San Antonio)
- Climate Factor: High heat, intense UV rays, high humidity in coastal/eastern areas.
- Wood Behavior: Fresh PT wood dries rapidly on the surface due to heat, but internal moisture can stay trapped.
- Sanding Strategy: Perform the water drop test carefully. Sanding with 80-grit helps open heat-baked surface pores before applying a heavy-duty UV-blocking sealer.
2. California & San Francisco Bay Area
- Climate Factor: Coastal fog, dry summers, strict VOC (Volatile Organic Compound) regulations.
- Wood Behavior: San Francisco fog keeps wood damp during morning hours, delaying drying. California VOC laws mandate specific water-based or low-solvent oil sealers.
- Sanding Strategy: Light sanding (100-grit) is strongly recommended when using California-compliant waterborne penetrating stains to help water-based formulas lock into the grain.
3. Washington State (Seattle, Spokane, Olympic Peninsula)
- Climate Factor: Extended rainfall, high dampness, cool temperatures.
- Wood Behavior: Pressure-treated wood takes significantly longer to dry out in the Pacific Northwest—sometimes requiring 3 to 6 months post-installation before moisture content drops below 15%.
- Sanding Strategy: Always use a moisture meter before sanding or sealing. Sanding damp wood in Washington will destroy sandpaper grit within minutes and cause wood fibers to tear rather than cut smoothly.
4. New York (NYC, Upstate, Long Island)
- Climate Factor: Severe freeze-thaw cycles, snowy winters, hot humid summers.
- Wood Behavior: Trapped water will freeze and expand in winter, popping sealers right off the wood.
- Sanding Strategy: Thorough sanding to open wood pores allows deep oil penetrating sealers to bond securely, preventing winter moisture infiltration.
Comparison: Sanding vs. Chemical Stripping & Brightening
| Feature | Sanding | Chemical Cleaner / Brightener |
| Best For | Mill glaze, physical splintering, rough spots, level surfaces | Mild graying, deep mold stains, hard-to-reach railings |
| Time Required | Moderate to High (Labor intensive) | Fast (Spray on, scrub, rinse) |
| Dust Created | Yes (Requires safety PPE) | No dust (Requires chemical splash protection) |
| Surface Smoothness | Superior smoothness and splinter elimination | Does not level physically uneven wood boards |
| Equipment Cost | $40–$150 (Sander, sand paper pads) | $20–$50 (Chemical containers + pump sprayer) |
Top 10 Frequently Asked Questions (FAQ)
1. How long should I wait to sand and seal new pressure-treated wood?
You should wait anywhere from 3 weeks to 6 months, depending on your weather conditions and the dampness of the wood at purchase. Test the wood periodically using a moisture meter (aim for under 15%) or the water drop test before proceeding.
2. What grit sandpaper is best for pressure-treated deck boards?
Use 60-grit to 80-grit to remove mill glaze, stains, or splinters, followed by 100-grit for final smoothing. Do not exceed 120-grit, as overly fine sandpaper seals the wood pores shut.
3. Can I use a belt sander on a pressure-treated deck?
Yes, but exercise caution. Belt sanders are aggressive and can leave deep gouges if kept in one spot too long. A random orbital sander or orbital floor sander is much safer and yields an even finish.
4. What happens if I seal pressure-treated wood without sanding?
If your wood has mill glaze or old flaking finish, the new sealer will fail to penetrate. It will dry as a surface film that bubbles, turns sticky, or peels off within a few months.
5. Does pressure-treated wood need to be brightened after sanding?
It is good practice. Applying a wood brightener (oxalic acid-based) after cleaning or sanding neutralizes alkaline cleaners, opens the grain further, and restores the natural wood tone before sealing.
6. Can I power wash instead of sanding pressure-treated wood?
Power washing cleans dirt and mildew, but it does not remove mill glaze as effectively as sanding. Additionally, high pressure can damage soft pine fibers, creating a fuzzy texture that requires sanding anyway.
7. Is sanding pressure-treated wood dangerous to my health?
Yes, if proper precautions aren’t taken. The dust contains copper preservative chemicals. Always wear an N95 or P100 respirator, eye protection, long pants, and long sleeves when sanding PT lumber.
8. Should I sand between coats of wood sealer?
Generally no. Most penetrating wood sealers and semi-transparent stains are meant to sink into the grain, not form a thick film. Sanding between coats can prevent the second coat from bonding properly unless specified by the coating manufacturer.
9. What is the ideal moisture level for sealing pressure-treated wood?
The ideal wood moisture content is below 15%. Any reading above 18% means the wood is too wet and will cause the sealer to peel.
10. Do vertical surfaces like fences need the same sanding as deck floors?
Vertical surfaces dry faster and experience less foot abrasion, but they still suffer from mill glaze when new. A light pass with 80-grit sandpaper on fence boards ensures even absorption of your stain or sealer.
Essential Pro Tips for Success
- Check the Forecast: Ensure you have 48 hours of dry weather with temperatures between 50°F and 90°F following sealer application.
- Apply Thin Coats: When applying penetrating sealers or oil stains, apply thin coats. Wipe off any excess pool after 15–20 minutes so it doesn’t leave a sticky residue.
- Inspect Fasteners: Drive down all raised deck screws or pop-up nails below the board surface before running an orbital sander over the deck to avoid tearing your sandpaper or damaging the sander pad.
Final Thoughts & Verdict
Sanding pressure-treated wood is not always necessary for every brand-new project, but it is the single best prep step to guarantee long-term sealer adhesion. Taking the time to test for moisture, sand off mill glaze with 80-to-100-grit paper, and clear off wood dust ensures your deck or fence will resist peeling, cracking, and rot for years to come.